Make the most of your Sprout trial
Written by Christina Zylius
Published on December 10, 2020
Reading time 7 minutes

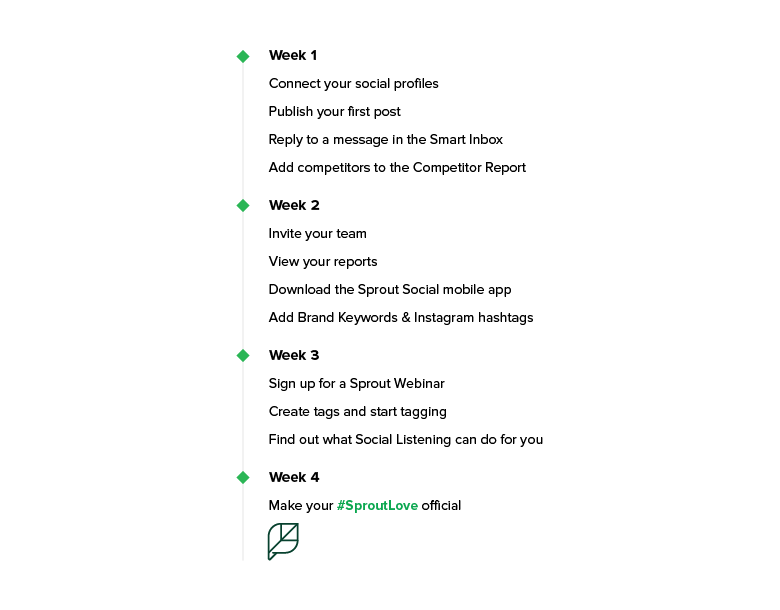
Now that you’ve signed up for your Sprout Social 30-day free trial, you may be wondering: what should I do next? To answer that question, our team of Support Customer Advocates and Account Executives have compiled a week-by-week list to help you make the most of your Sprout trial.
Read on to get our expert guide on the essentials you should focus on each week of your trial. We’ll take you from how you can easily make your first post in the Compose window and level up to diving into the insights social listening has to offer your campaign.
Week 1
Connect your social profiles
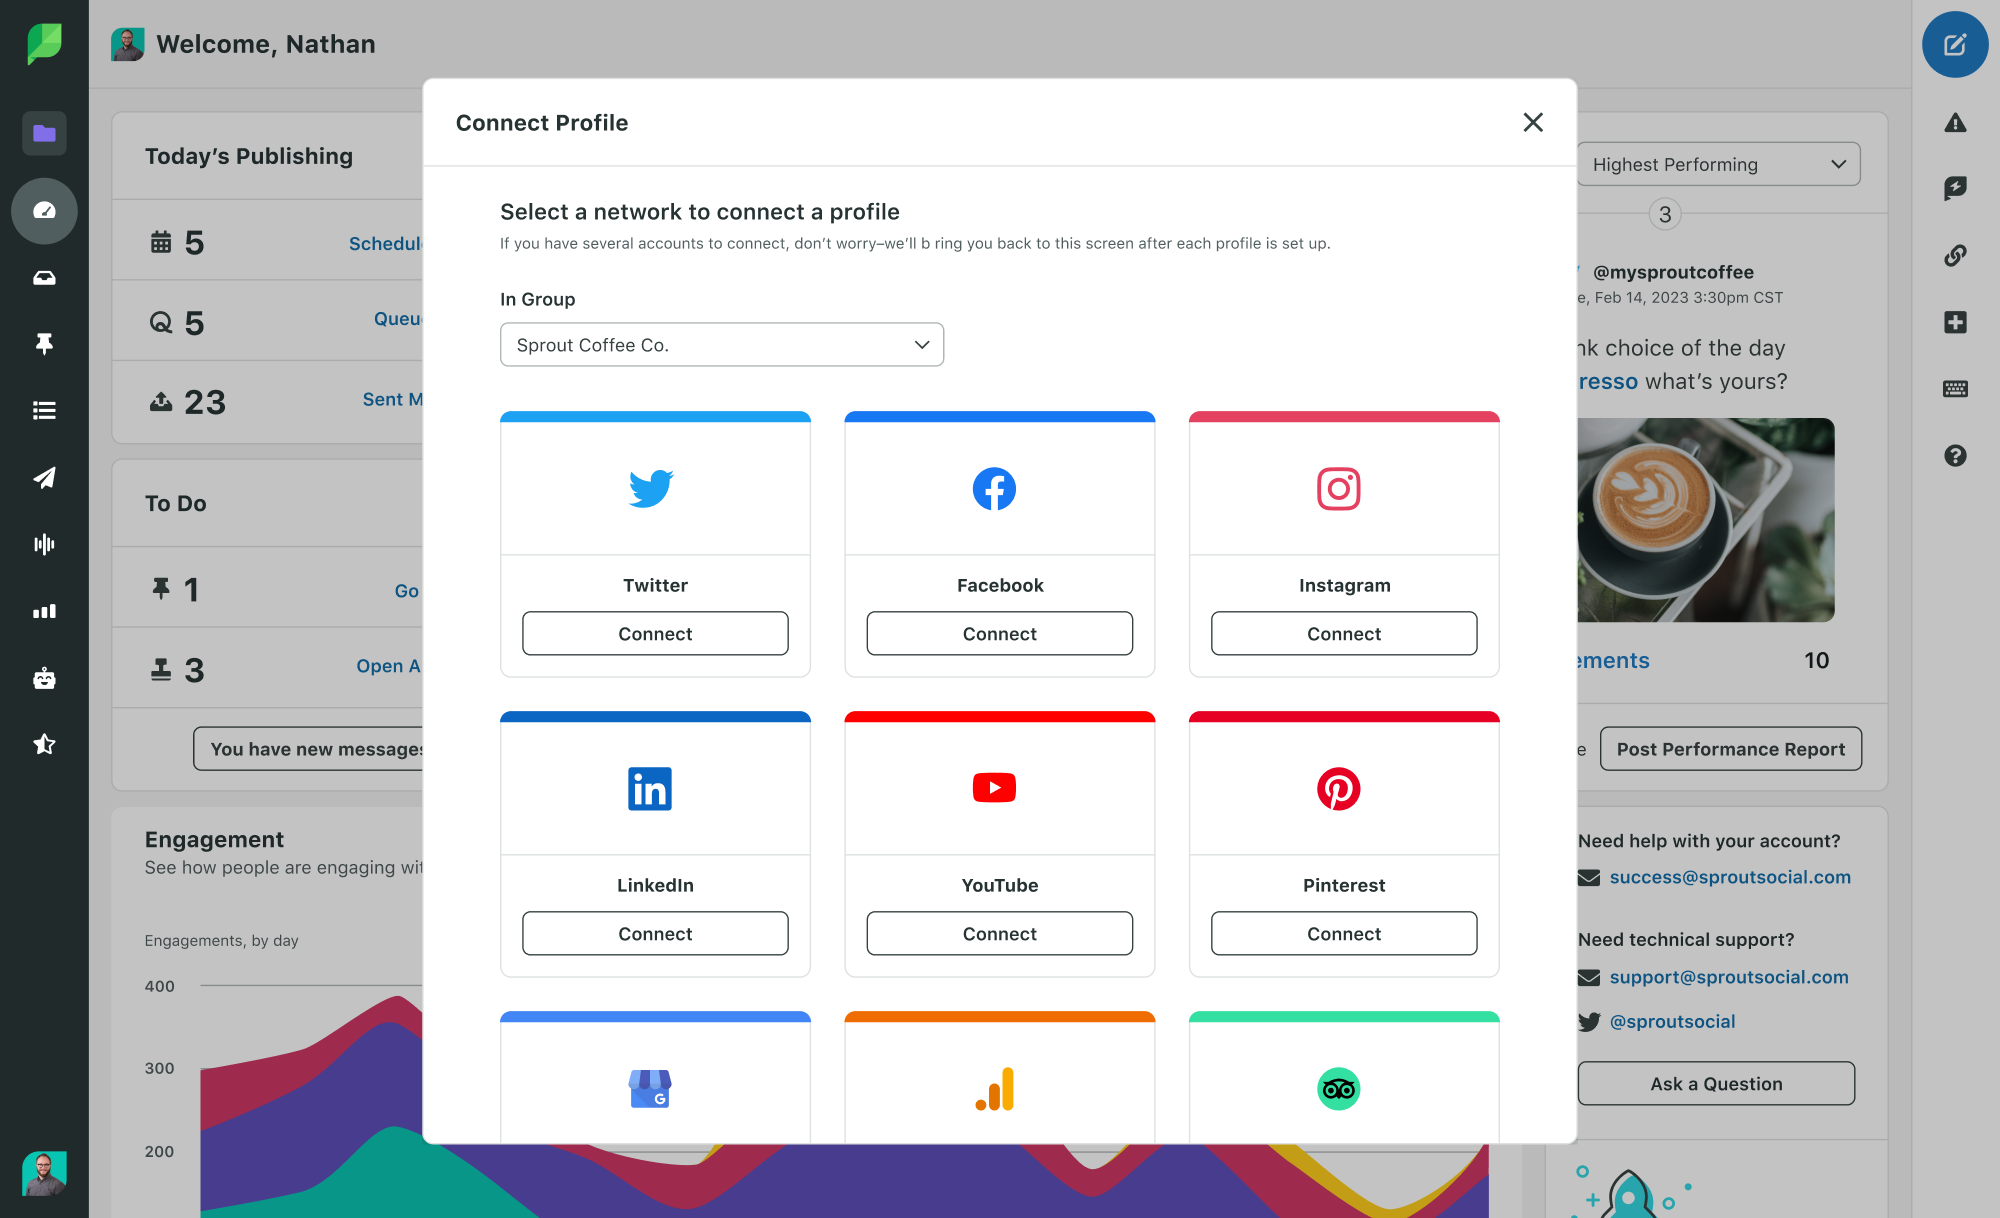
When first signing into Sprout, you’ll be prompted to connect a Twitter profile. Once you’ve done that, there are still quite a few social profiles you’ll have the option to connect, including Facebook, Instagram, LinkedIn and Pinterest, as well as Ad Accounts for Facebook, Instagram, LinkedIn and Twitter. You can find a full list of Sprout’s integrations here.
To connect new social profiles, click the + icon in the top right corner of your Sprout screen and follow the prompts to connect your chosen profile.
Once you’ve connected your profiles, you can begin taking advantage of Sprout’s features.
Pro tip: If you’re connecting an Instagram Business Profile, you will want to be sure to complete the dual connection process through Instagram.com and Facebook.com, which is outlined in this Sprout Help Center article.
Publish your first post
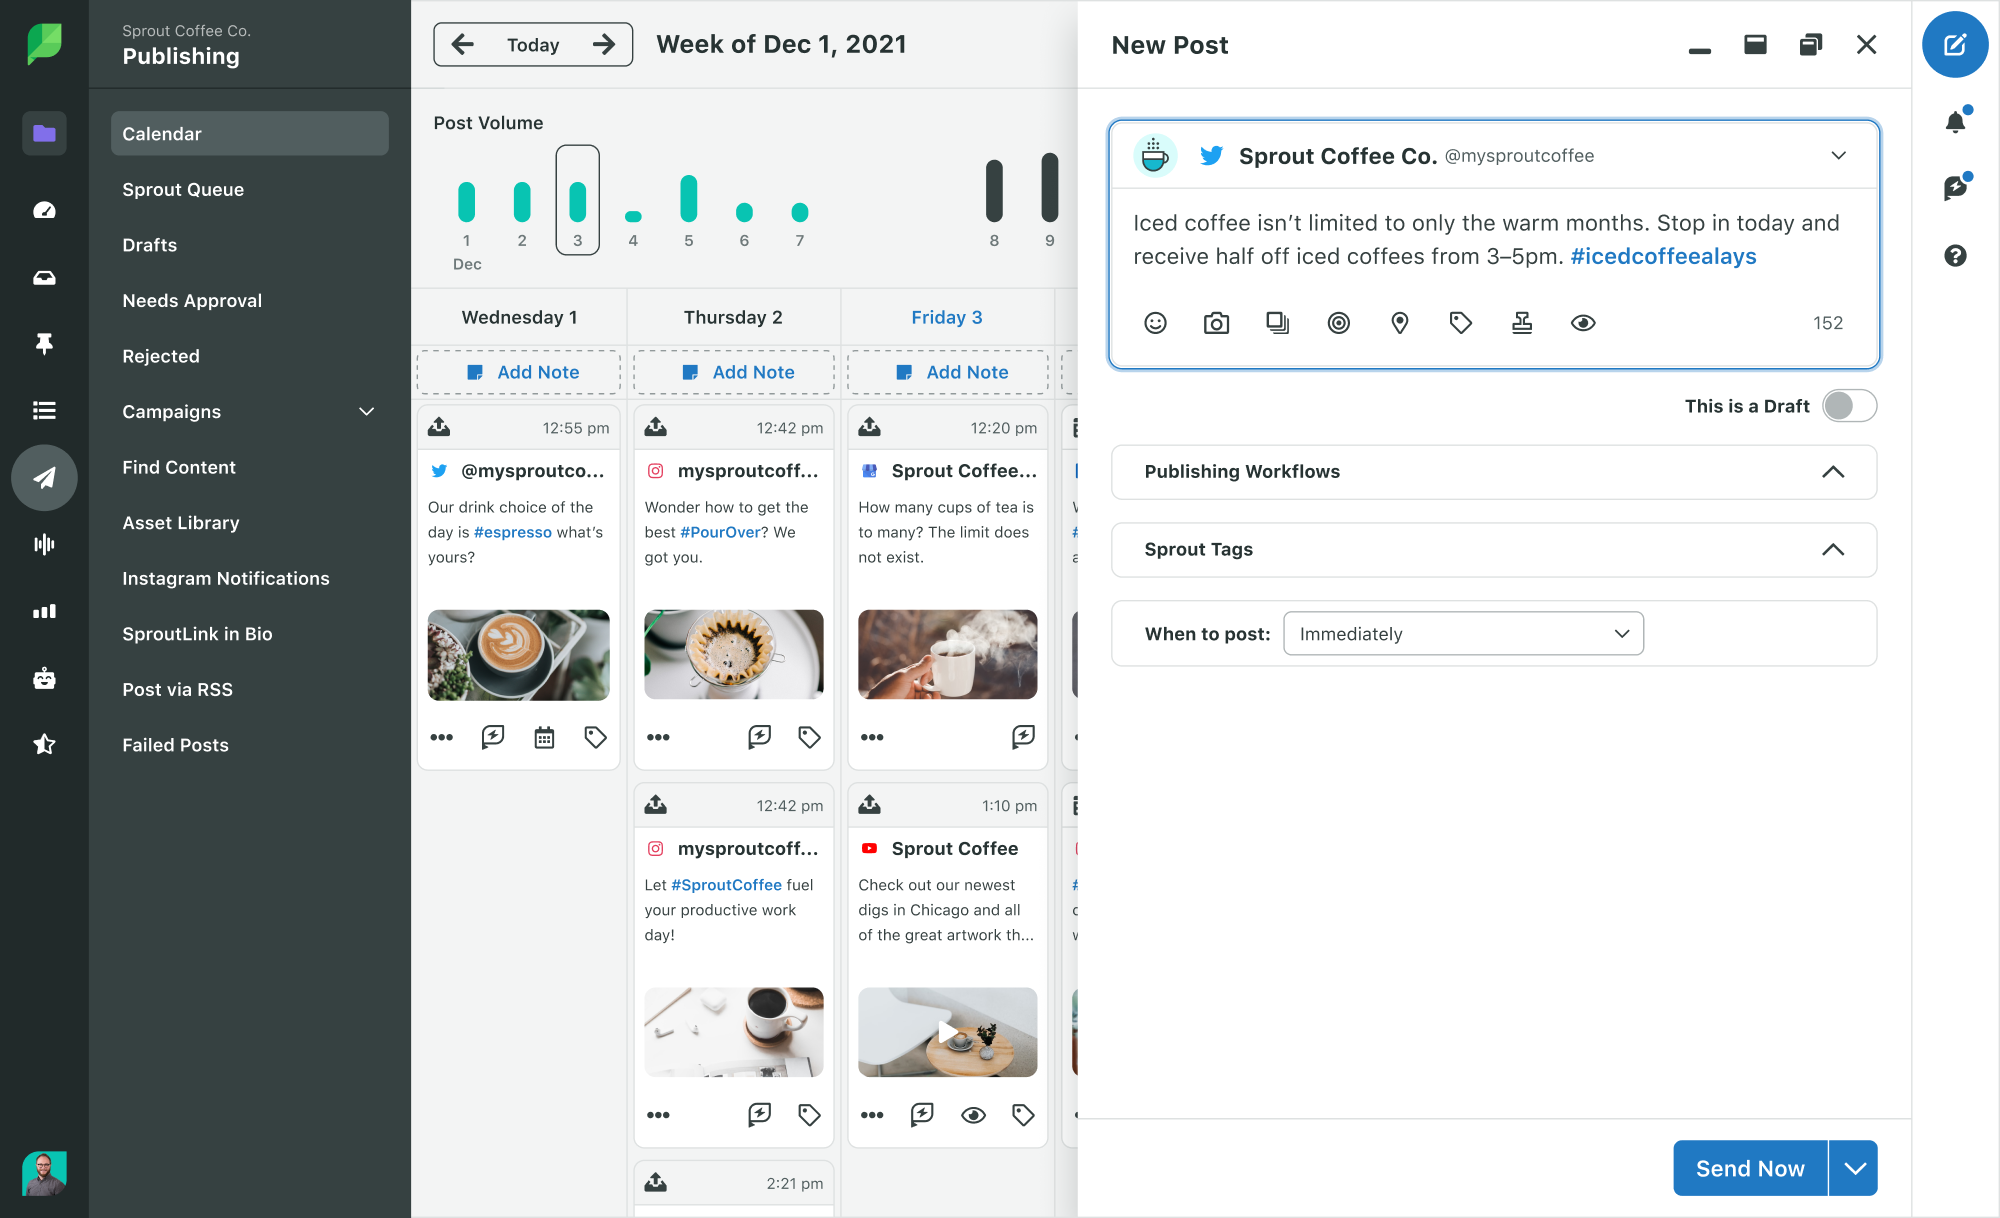
To begin creating a post, click the green Compose button in the top right corner of Sprout, which is always available for your convenience.
In the Compose window, you’ll have the option to choose one or more social profiles in the top selection bar. Once you input text, media and other post elements, you’ll see a Network Preview on the left of the window. From this window, you can also choose a location for your post, send the post for approval, add tags for tracking message types and more – you’ll learn more about these features as you progress through this article and through your trial!
For new posts, you can also choose scheduling options, such as whether to Publish Now, Add to the Queue, Schedule Manually or Save as Draft. For more information on each of these post types, check out our Introduction to Publishing in Sprout.
Reply to a message in the Smart Inbox
In addition to creating new content for your social, you can engage with incoming messages in Sprout’s Smart Inbox, which pulls together incoming content from Twitter, Instagram, Facebook and LinkedIn. You can reply to or like an incoming message to keep interacting with your audience.
Pro tip: In the right sidebar of the Inbox, you can choose which social profiles are filtering into your Inbox at a given time, and can select “Hide Completed Items” to clean up messages you’ve already replied to from your current view.
Add Competitors on your Competitor Reports
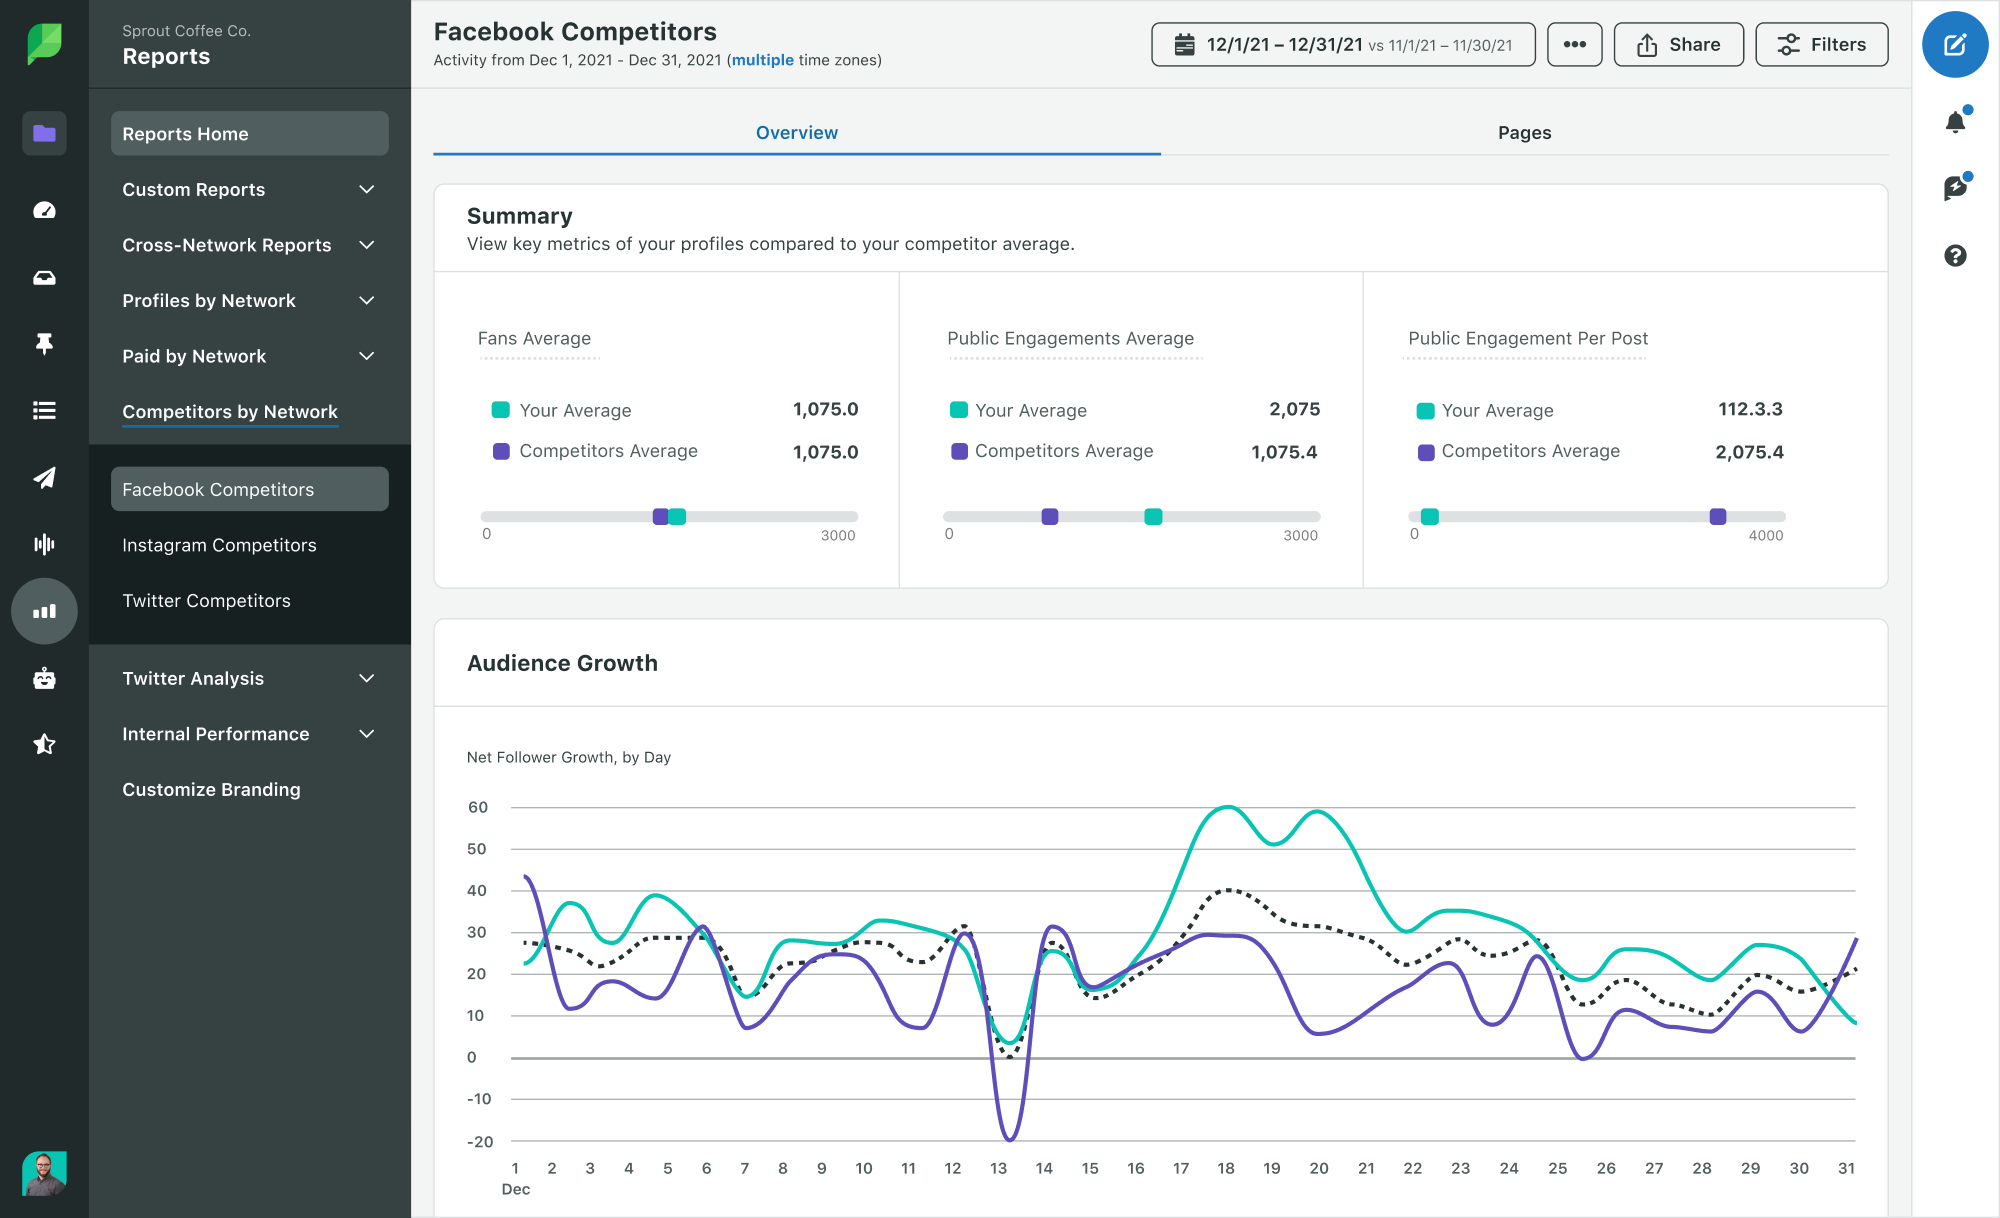
Much like reporting on your own profiles, you’ll get the most out of your Competitor Reports by adding your competitors as soon as possible, as data on these reports is available starts being available from the time of connection. You can find these Reports by going to the Reports tab and choosing each respective network in the left sidebar.
You can add up to 20 competitors on both the Facebook Competitors Report and the Instagram Competitors Report at once. For the Twitter Comparison Report, you can track 20 competitors, and toggle between views to see each competitor.
As this report starts populating data, you can kick off your competitive analysis by reviewing your competitors’ audience growth, engagements and even Top Posts to see what post types are working best in your industry.
Pro tip: Competitor Reports are available on our Professional and Advanced Plans. If you started your trial on our Standard Plan, you can still try out Competitor Reports by upgrading to a free Professional or Advanced 30-day trial under Settings > Billing & Plan.
Check out Sprout’s Getting Started Page
Would you rather see a video walkthrough of these features? As you’re getting set up, check out our Getting Started resources for short videos on adding profiles, publishing content and replying to messages.
You can also download our Sprout 101 Guide for your own quick reference or for distribution on your team.
Week 2
Invite your team
Why keep the #SproutLove to yourself? Invite your team by clicking the icon in the lower left corner of Sprout.
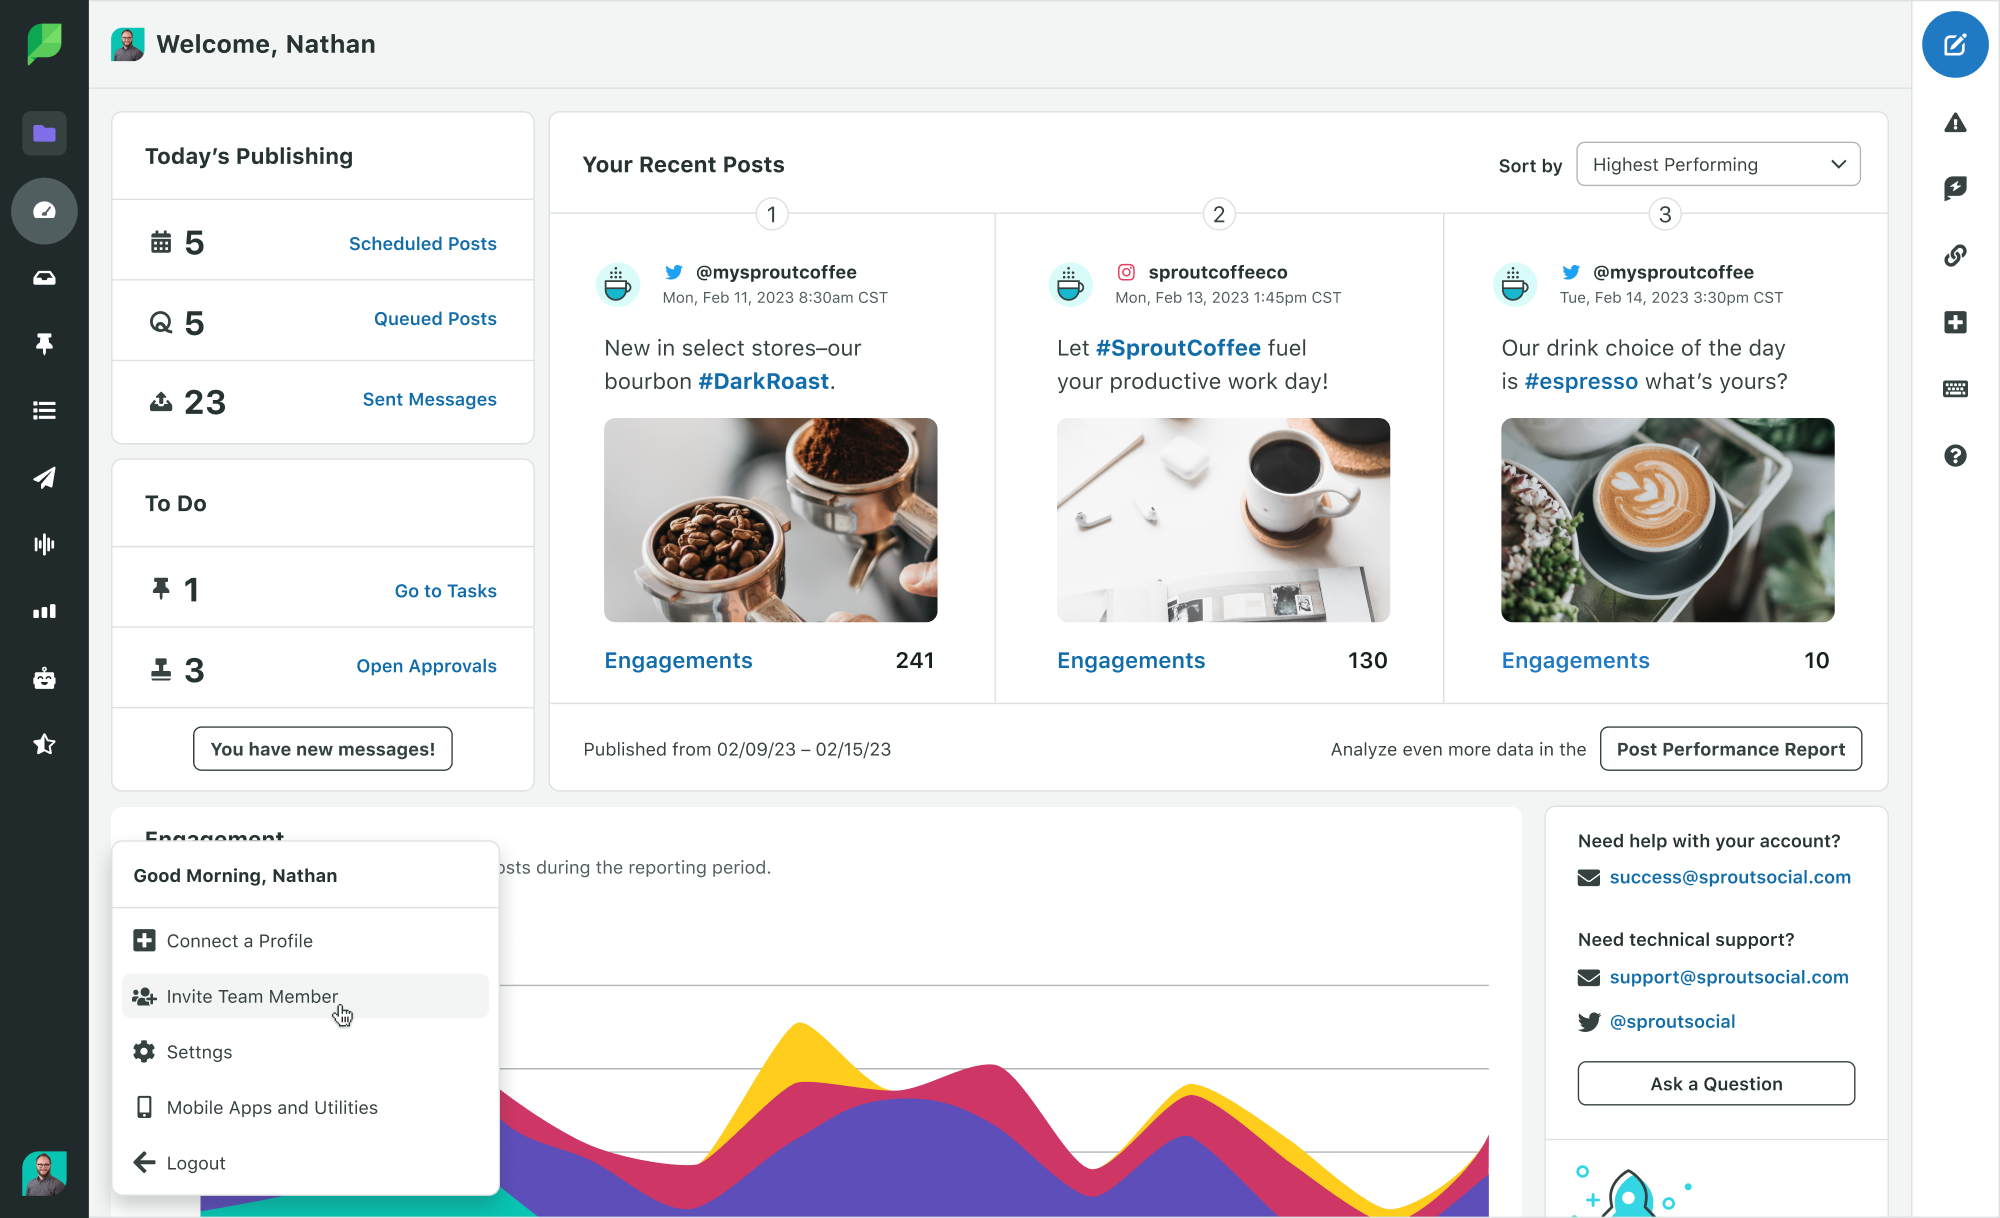
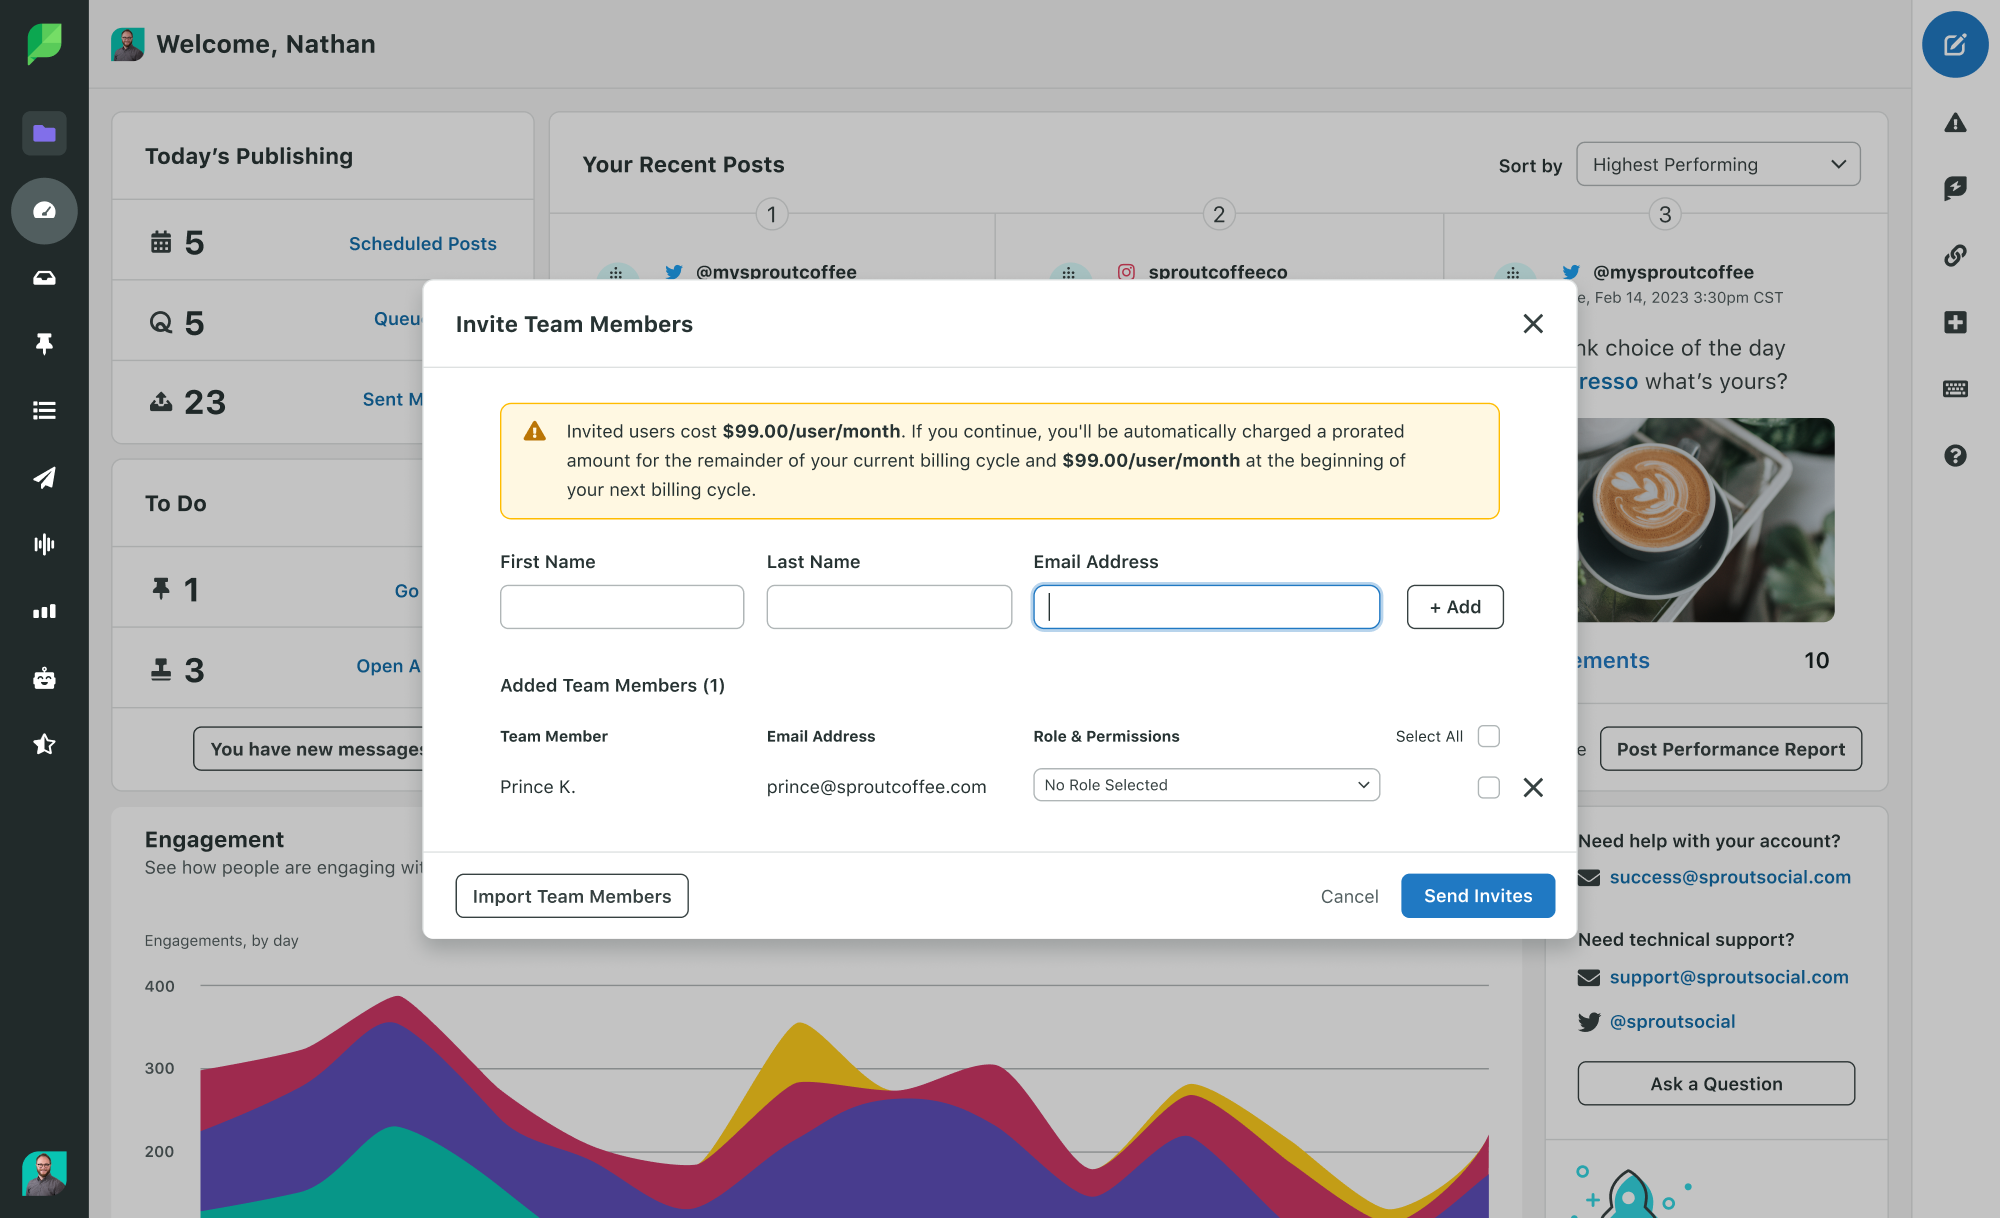
From there, you’ll need to input the email address(es) for your new user(s), and choose which Groups and profiles you’d like them to have access to. You can read our detailed guide on adding users and configuring permissions here.
Pro tip: On Sprout’s Professional and Advanced Plans, choose “Needs Approval” permissions for new users and set up Message Approval Workflows to have eyes on every post before publication.
View your reports
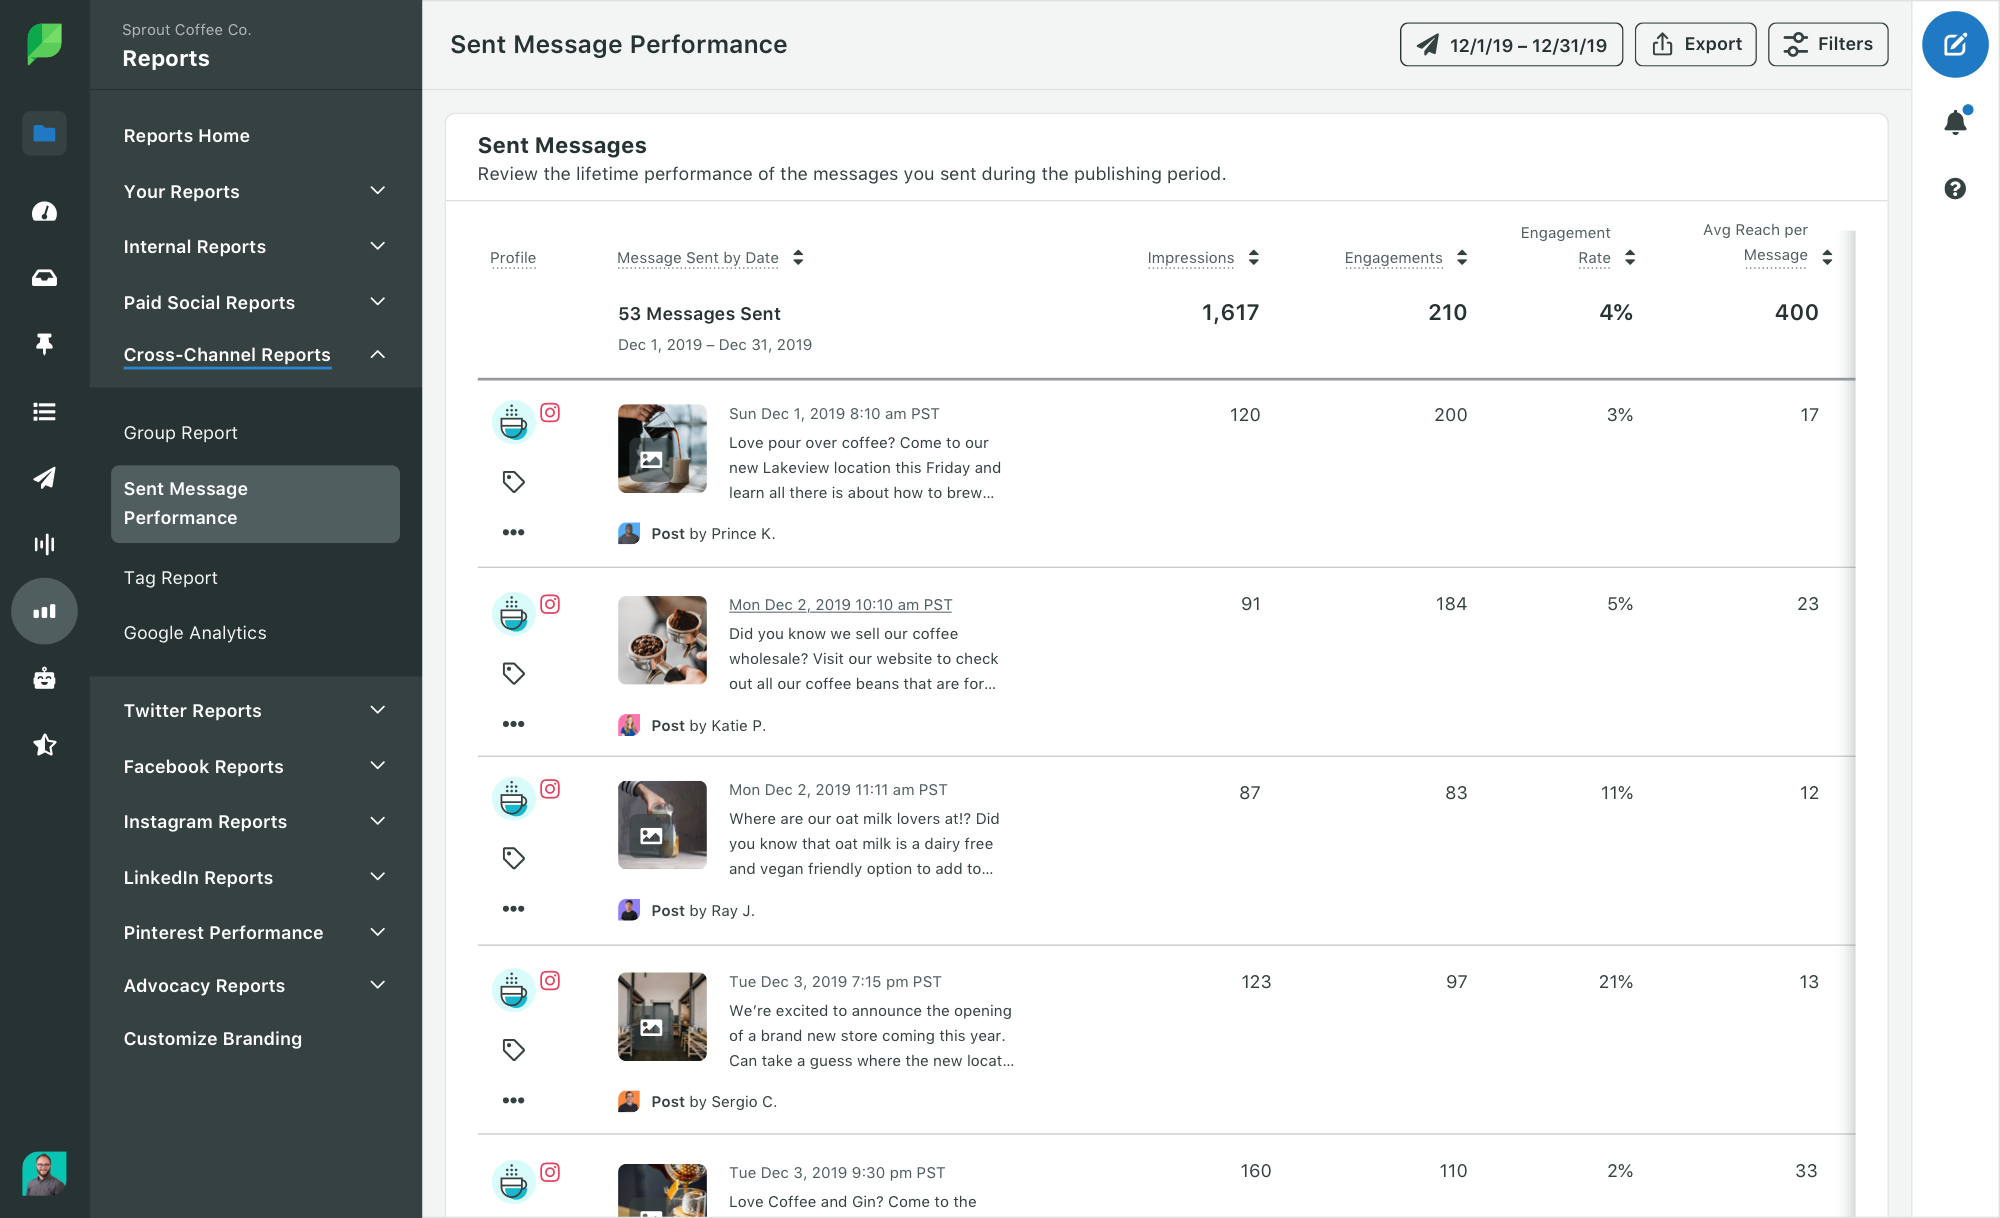
In addition to inviting your team to Sprout, you’ll start to see reporting for profiles like Twitter and Instagram by the start of the second week of your trial. You can find these reports in our Reporting tab, and choose the respective network in the left sidebar.
On these reports, you’ll see Profile- and Page-Level metrics. This provides you and your team with an overview of how your Profile or Page performed overall this month. With totals received directly from the native social platforms, these reports track any Engagements, Impressions and other metrics that your Profile or Page received, no matter when the post was originally published.
To see a full list of Sent Messages and Post-Level metrics for each social platform, you can go to Reports > Cross-Channel > Sent Messages Performance.
Pro tip: Set up Scheduled Report Delivery on Sprout’s Advanced Plan to keep stakeholders informed on your team’s progress.
Download the Sprout Social mobile app
We know that our users are often on the go, but still have great ideas for new posts or want to respond to the newest message in their Inbox. To stay in the loop even when you’re not at your desktop, you can find Sprout’s mobile app from the Apple App Store or Google Play Store by navigating in the Sprout app to Settings > Utilities & Goodies.
In addition to many of the features already available on the web version of Sprout, there are a few helpful features specific to the mobile app. These features include Instagram grid previews, failed push notifications for easy reposting and publishing Instagram multi-image Feed posts or Stories.
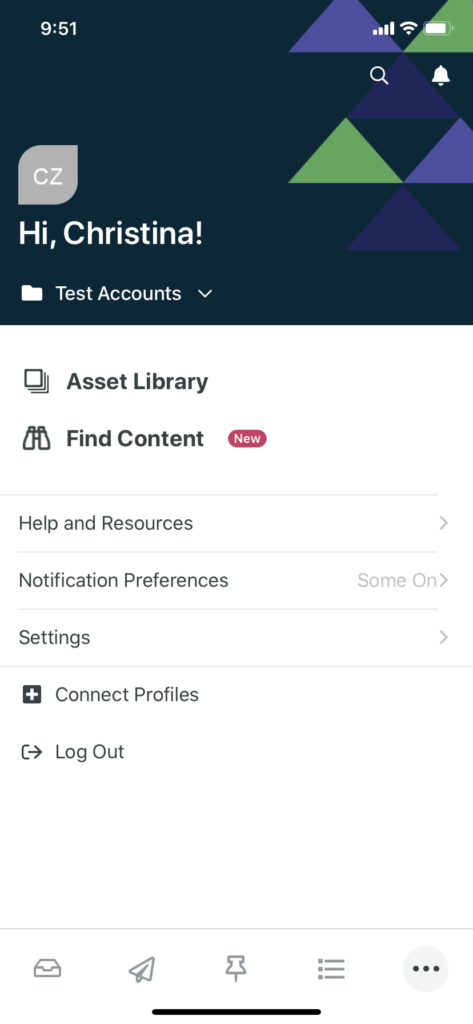
Pro tip: Click the gear icon in the top right corner of the mobile app > Notification Preferences to ensure all of your desired notifications are enabled, like Message Spike Alerts or successfully scheduled post alerts.
Add Brand Keywords & Instagram Hashtags
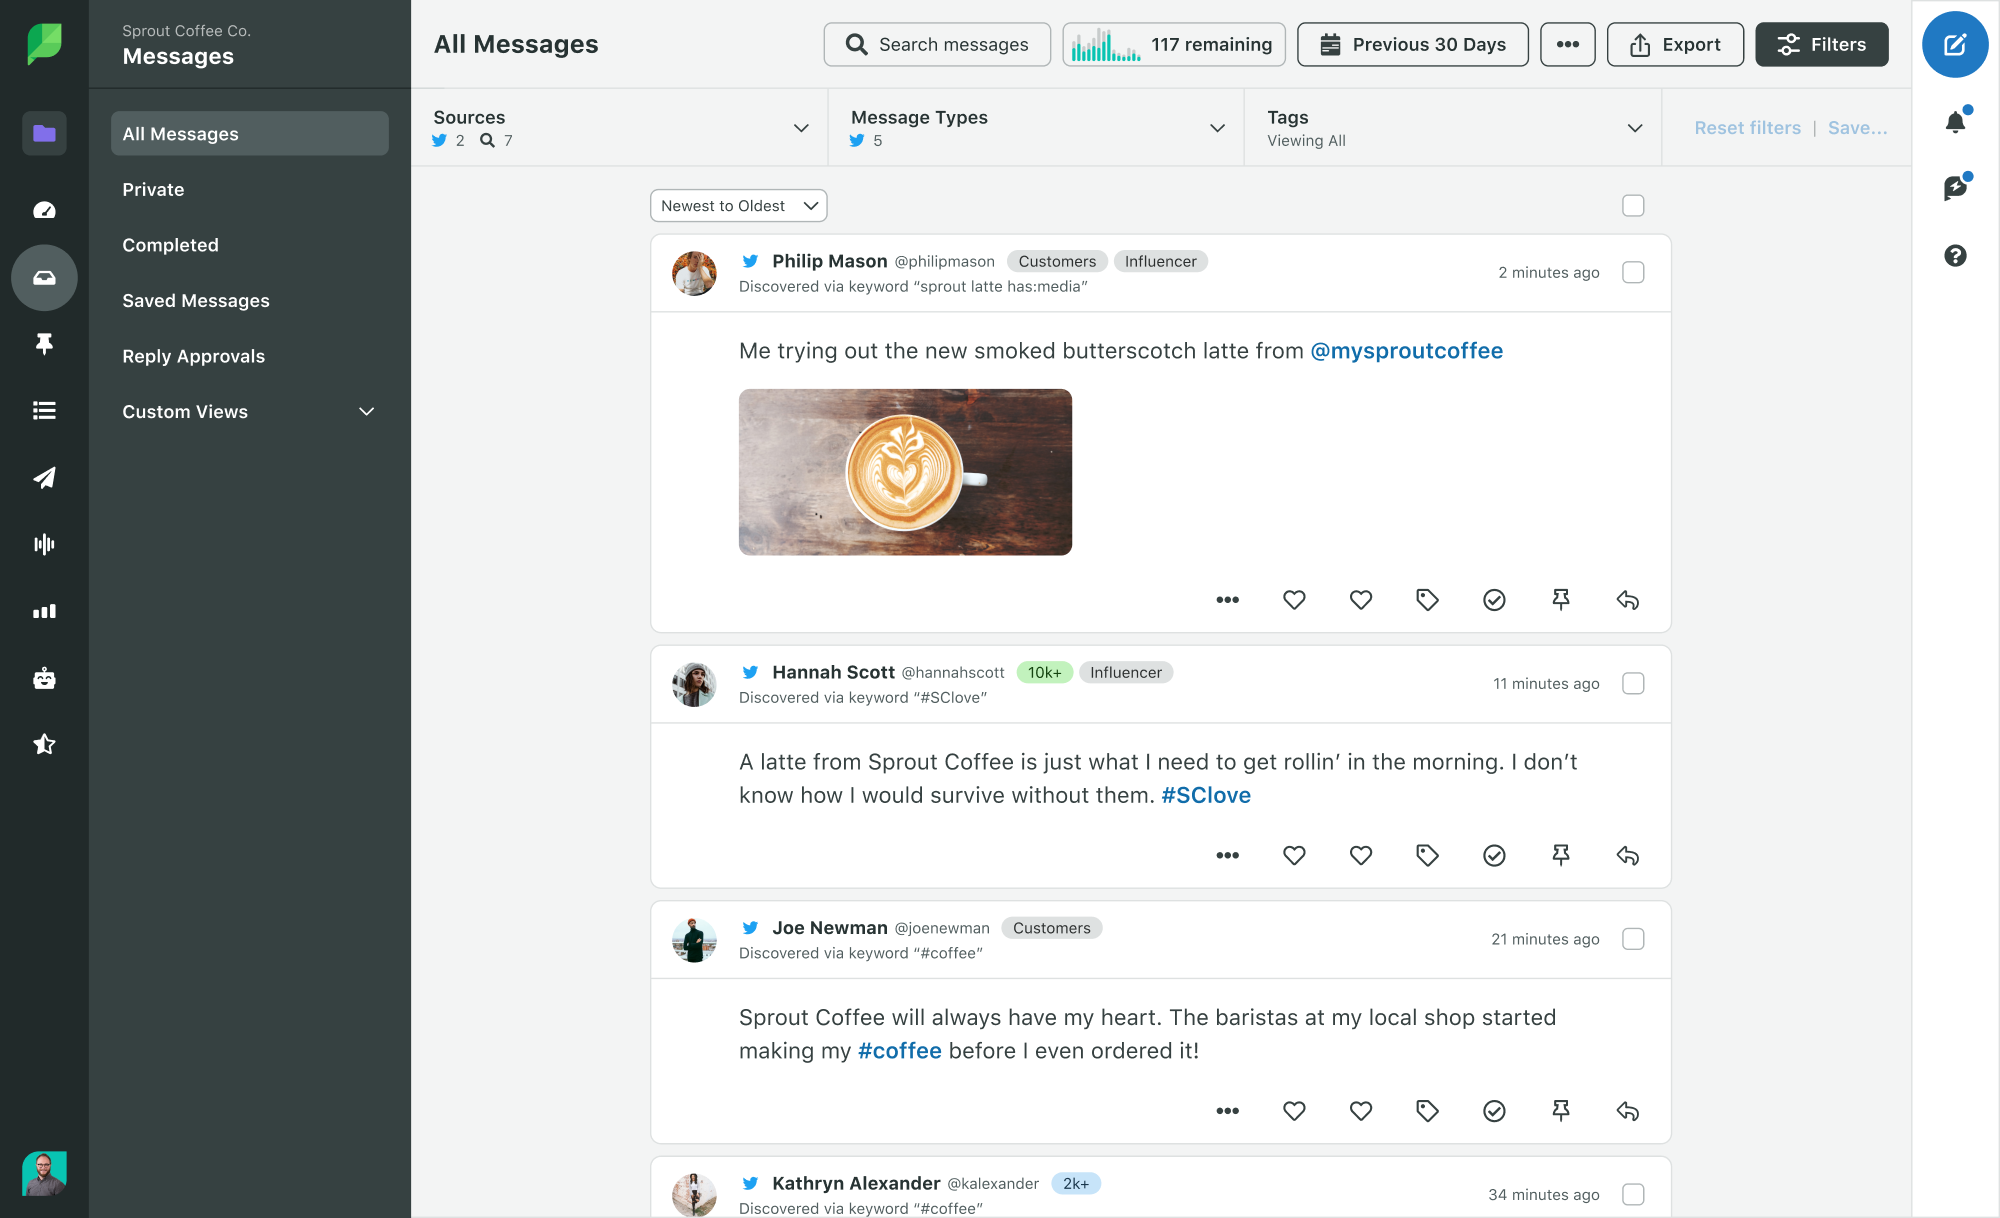
In Sprout, you can track Brand Keywords for Twitter so that even if your brand’s handle isn’t directly mentioned, you can be aware of and take part in the conversation. For example, if a user on Twitter says, “Sprout Coffee Co. has the best coffee!” but does not directly mention @sproutcoffeeco in their post, a Brand Keyword set up for “Sprout Coffee Co.” would pull that Tweet into Sprout for the team to respond.
To create a new Brand Keyword, open the Messages tab > Inbox > scroll down to Brand Keywords in the right sidebar. From there, click Add Keyword > enter your keyword > click Save Keyword to start tracking!
Week 3
Check out the Sprout Learning Portal
Now that you have familiarized yourself with the platform, head to our Learning Portal for more ideas on how you can take advantage of all of Sprout’s features. You’ll find on-demand sessions on everything from analytics to publishing to social listening, and you can also sign up for our Intro to Sprout live webinar series. Our Product Education team is ready to share their Sprout expertise with you, and they provide time for a live Q&A afterward.
Create Tags and start tagging
Now that you’ve been able to see how Sprout can help your workflow for Engagement, Publishing and more, start Message Tagging on our Professional and Advanced Plans to gain additional insight into your inbound and outbound messages.
For more strategies for Tagging, our team has compiled a guide for message tracking best practices and has shared how Sprout’s Social Team uses Message Tagging to build better customer relationships.
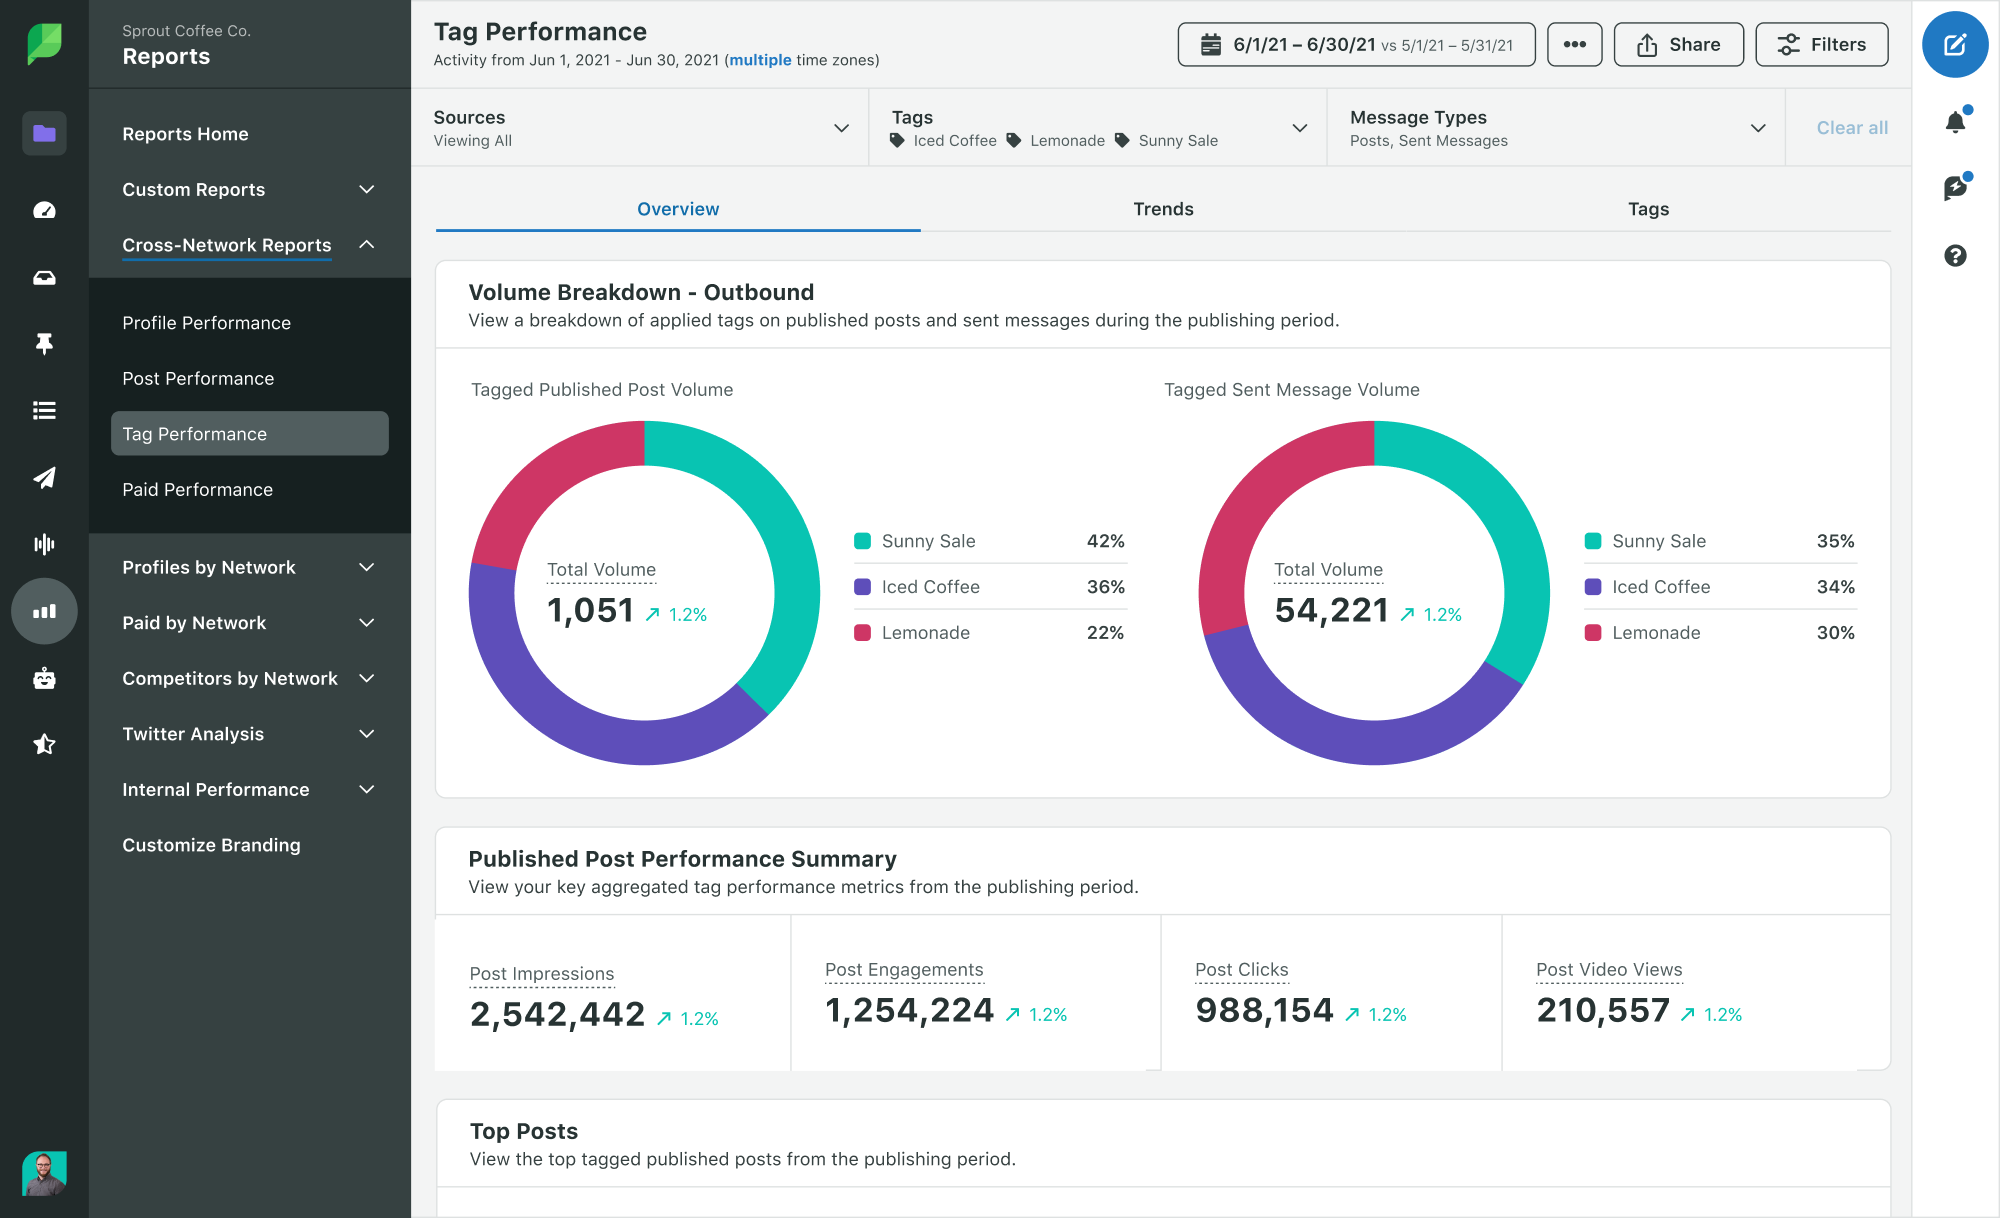
Pro tip: Create automated rules on Sprout’s Advanced Plan to immediately tag incoming messages with designated keywords, and even send an alert to your mobile app when key influencers mention your brand.
Find out what social listening can do for you
In addition to all of the great features included on your trial, Sprout offers a Listening add-on that can help you stay even more engaged with your audience.
Sprout’s Listening allows you to build Topics to find the conversations surrounding your brand or industry. You can then check out the Topic Insights to understand the patterns in your queries.
If you’d like to learn more, you can check out our social listening guide and request a listening demo.
Week 4
Make your #SproutLove official
Not ready to give up Sprout’s great features in your workflow? Now that you’ve had a chance to try Sprout for yourself, go ahead and sign up for your chosen plan! If you’re looking for tips, product updates or support along the way, follow on Twitter @SproutSocial and join our Facebook community groups to meet other social media experts.
Conclusion
These steps are just the start of optimizing your workflow through Sprout. If you haven’t taken advantage of your Sprout 30-day free trial yet, start one today and use this article to dive into our features.
Once you do, we’d love to hear from you! Whether you’re just beginning on your Sprout journey or have been with us from the start, share how you make the most of Sprout with us on Twitter at @SproutSocial.
Recommended for you
View all Recommended for you- Categories
How to optimize your social media workflow
Published on February 20, 2023 Reading time 7 minutes - Categories
7 social media management integrations brands need
Published on February 16, 2023 Reading time 10 minutes - Categories
Salesforce and Sprout Social are ushering in a new era of social media customer care
Published on December 6, 2022 Reading time 4 minutes - Categories
Plan, launch, report: How to master social media campaign management
Published on June 13, 2021 Reading time 9 minutes

Share